
Watch these videos to learn how to set up the ZKX Helix server and the Helix Authenticator app, step by step. The written instructions can also be found below, or you can download the PDFs.
- Download the Helix Server ISO image
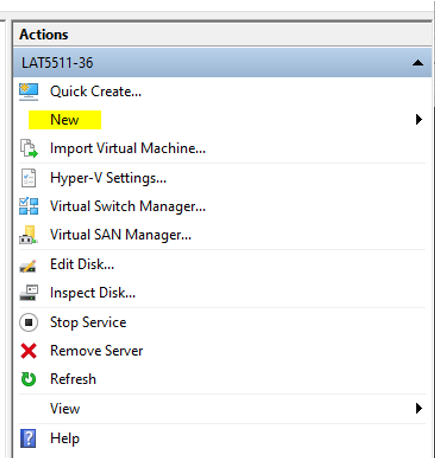
- Open a virtual machine manager of your choice (For this demonstration, we will be using Hyper-V Manager
- Create an empty virtual machine
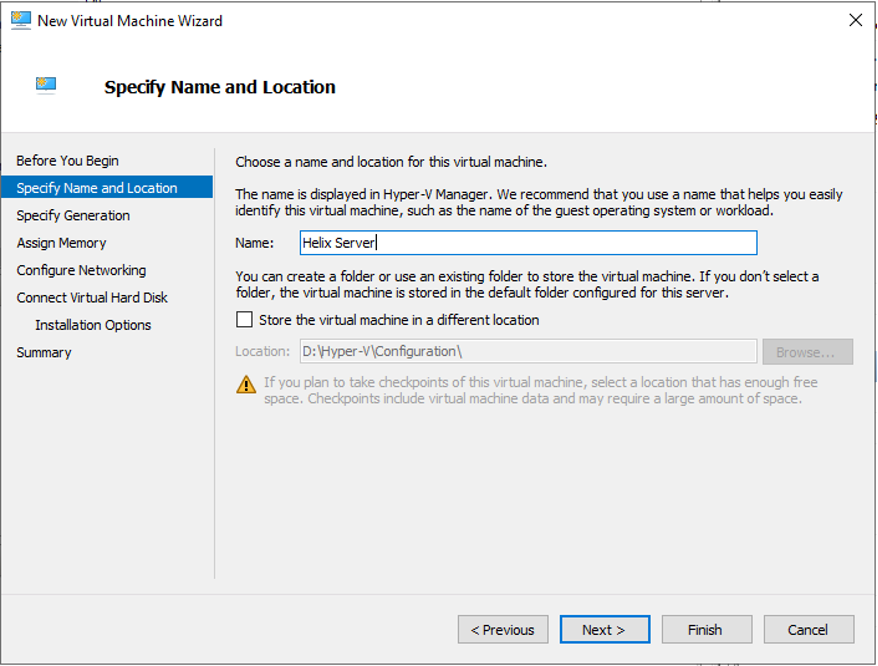
4. Specify the name of the Virtual Machine
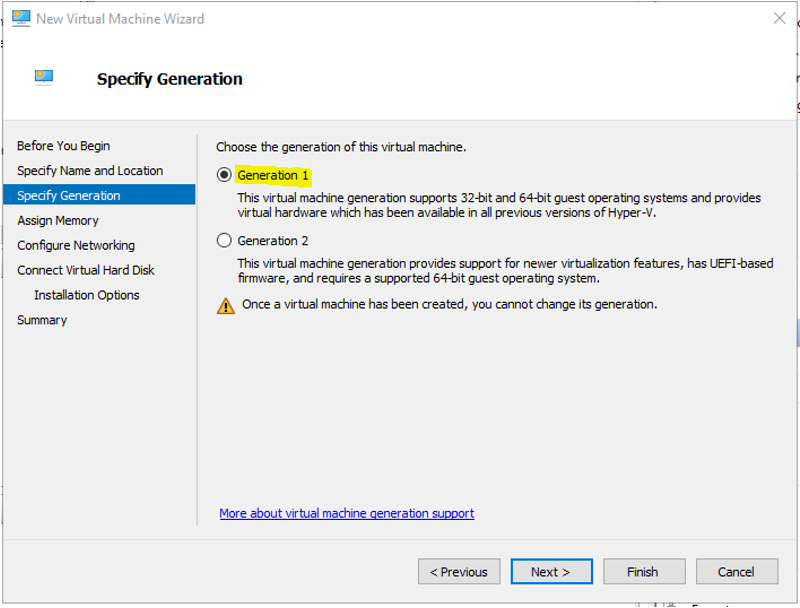
5. Choose Generation 1 Virtual Machine
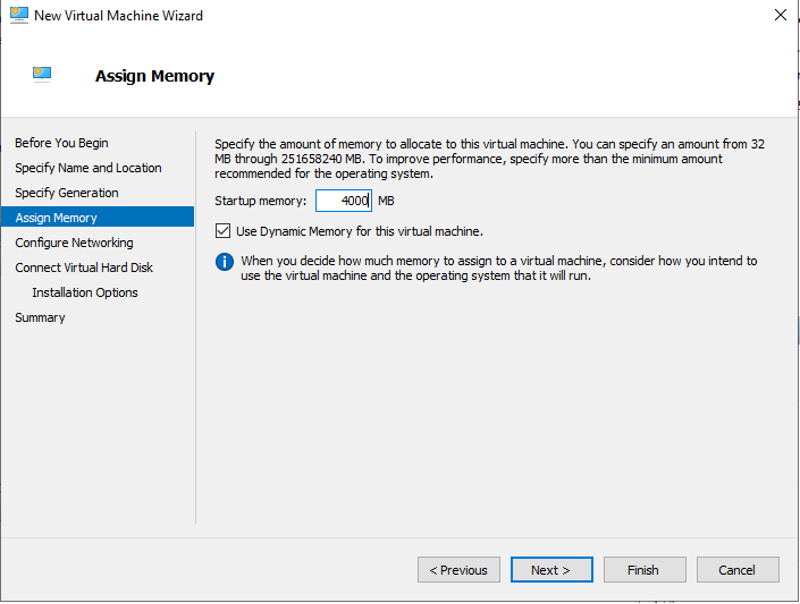
6. Assign memory
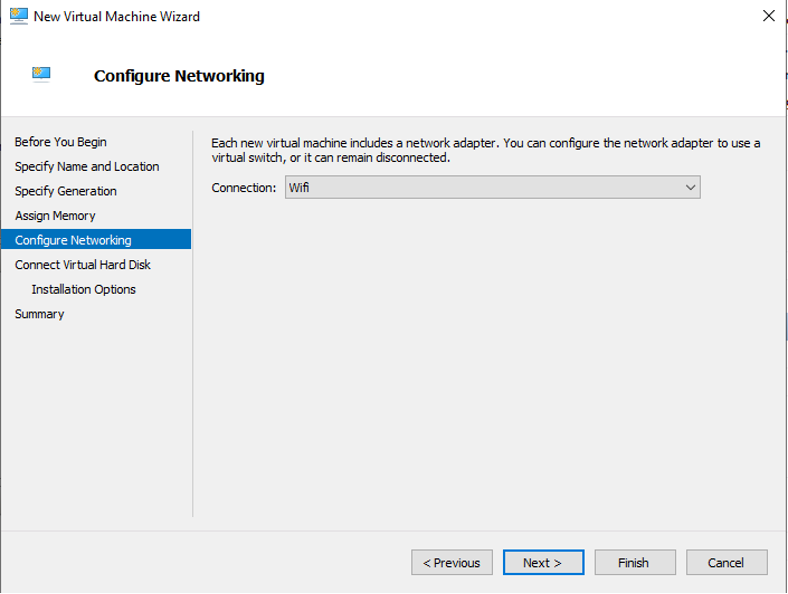
7. Connect to a network (Note: the Helix Server installation will still succeed even without a network connection)
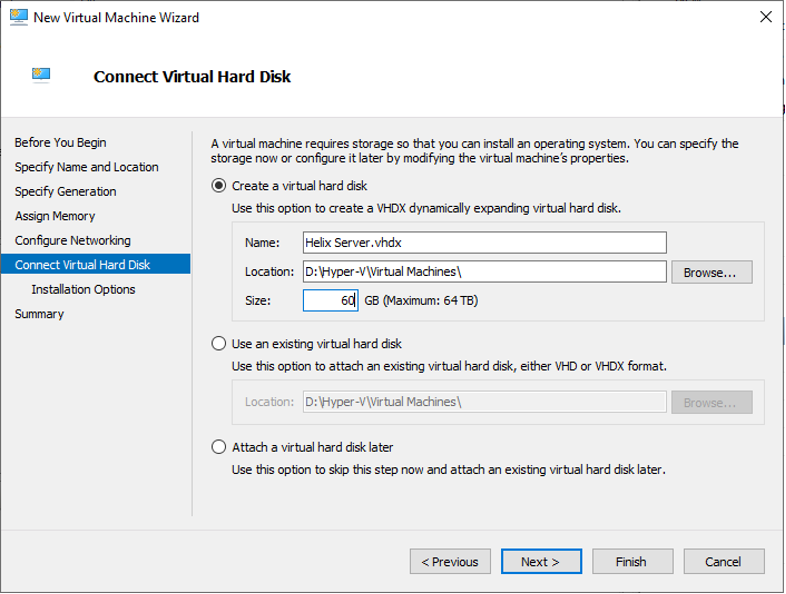
8. Assign the size of the Virtual Hard Disk
9. Install the OS later

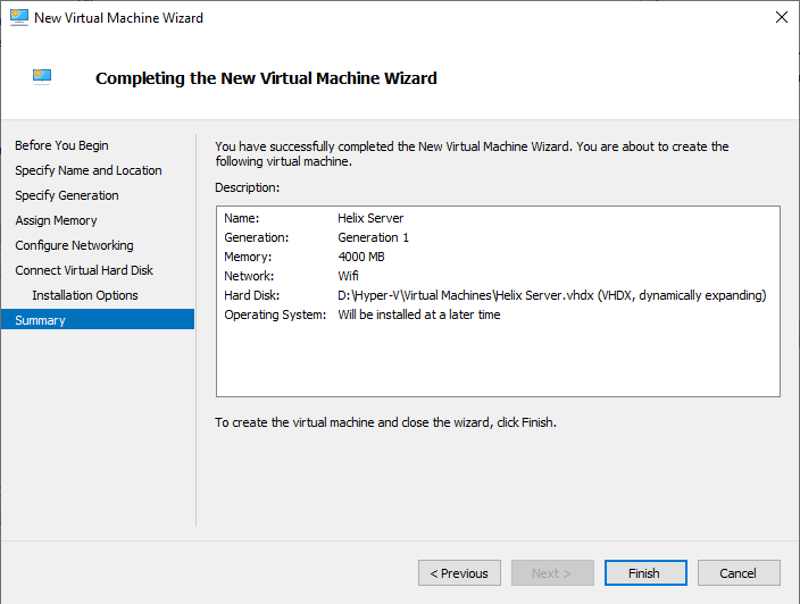
10. Finish creating the virtual machine
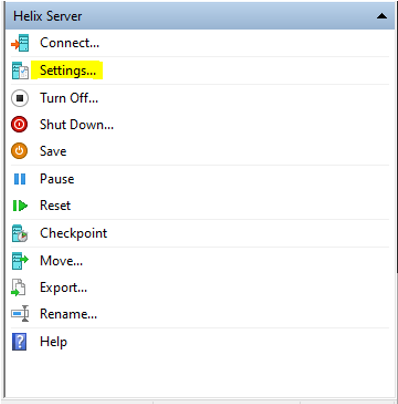
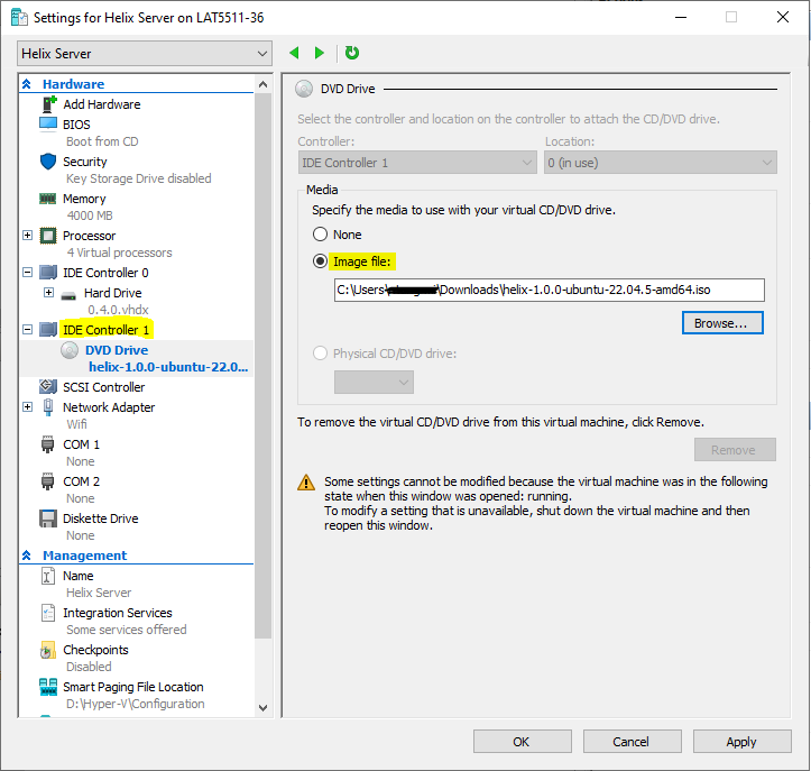
11. Go to the settings of the virtual machine
12. Go to IDE Controller 1 / DVD Drive. Select Image file and select the Helix Server iso image. Click Apply.
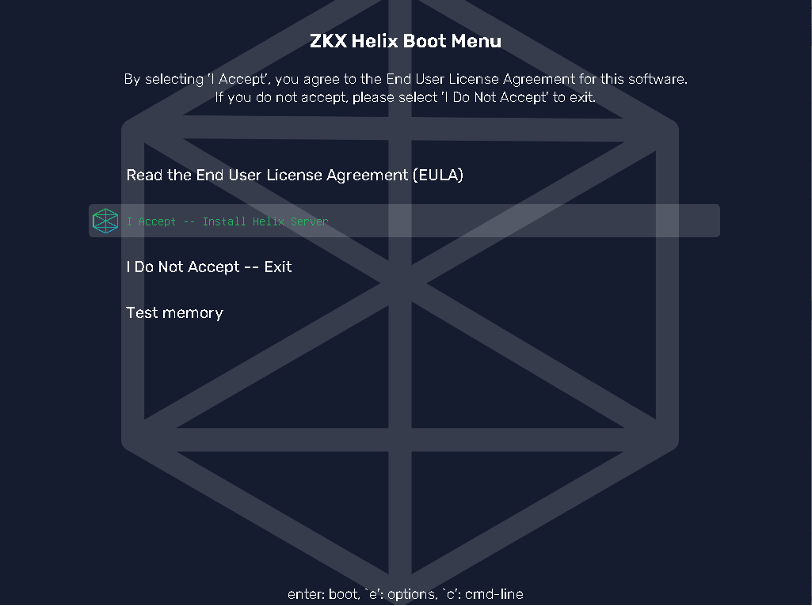
13. Start the Helix Server. You should see the ZKX Solutions EULA
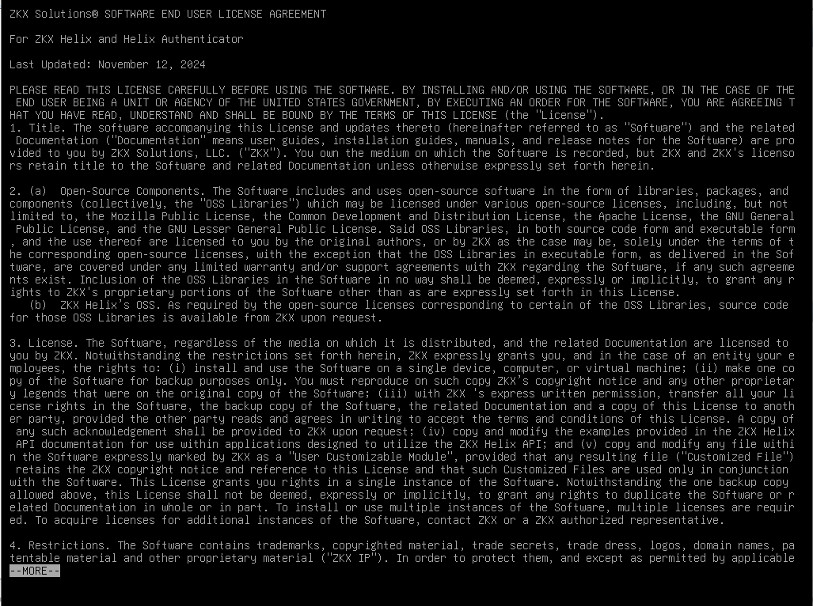
14. After reading the EULA, select I Accept – Install Helix Server
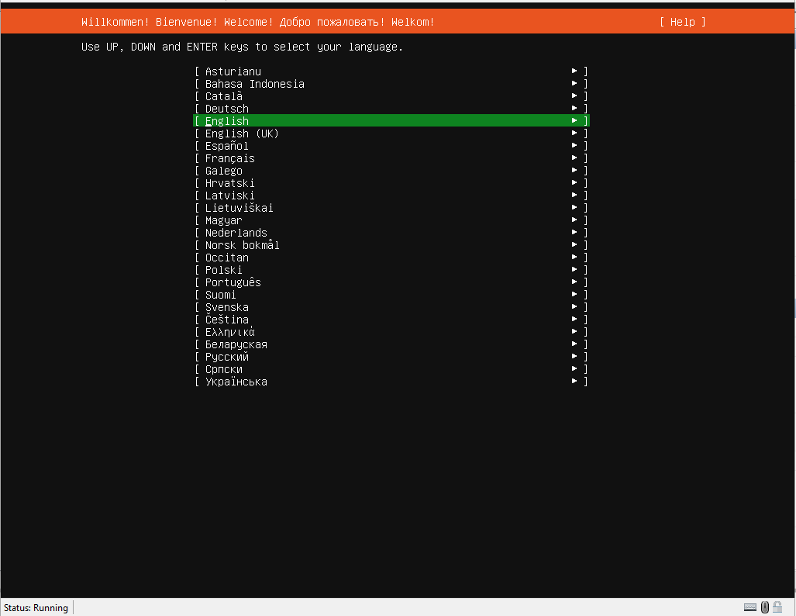
15. After the initialization, select your language
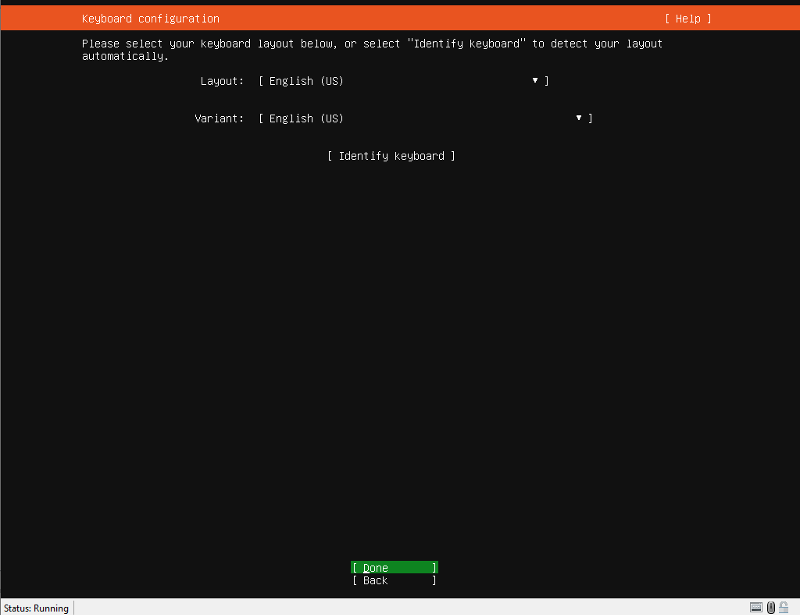
16. Select your keyboard configuration
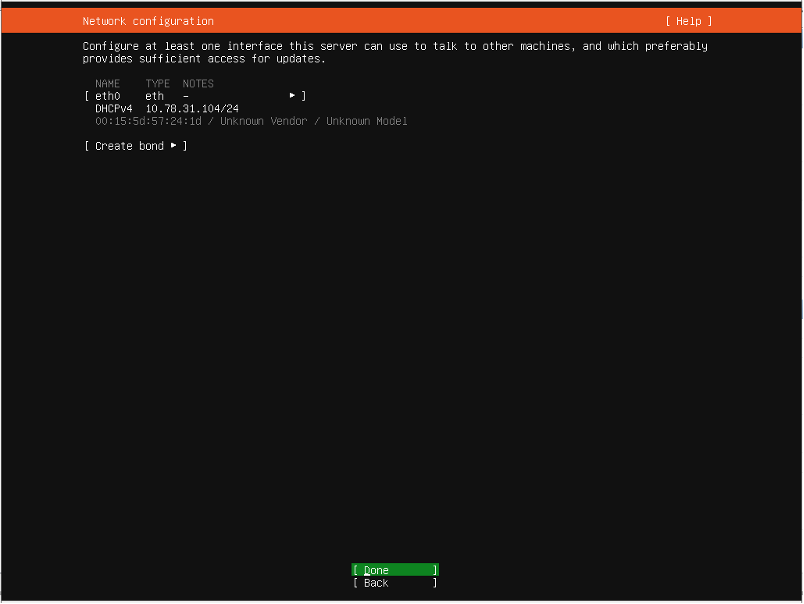
17. Select your network configuration
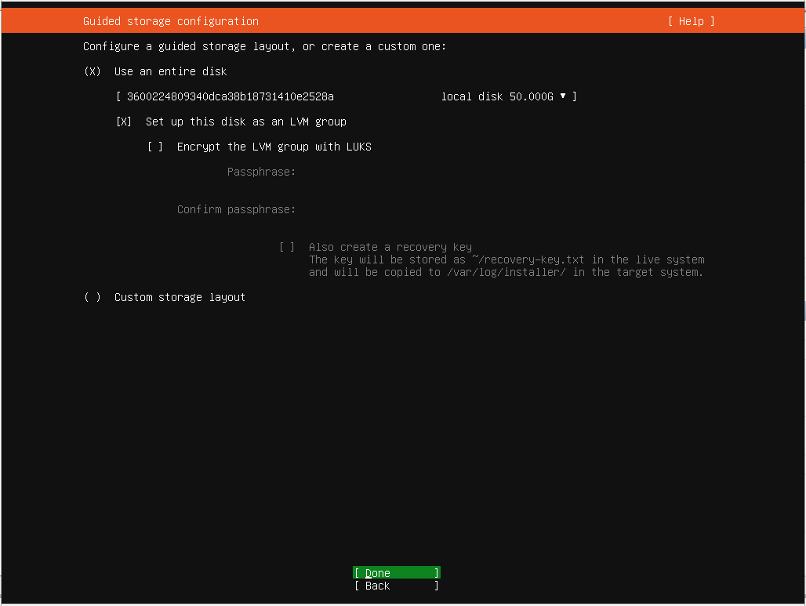
18. Use the entire disk for your storage configuration
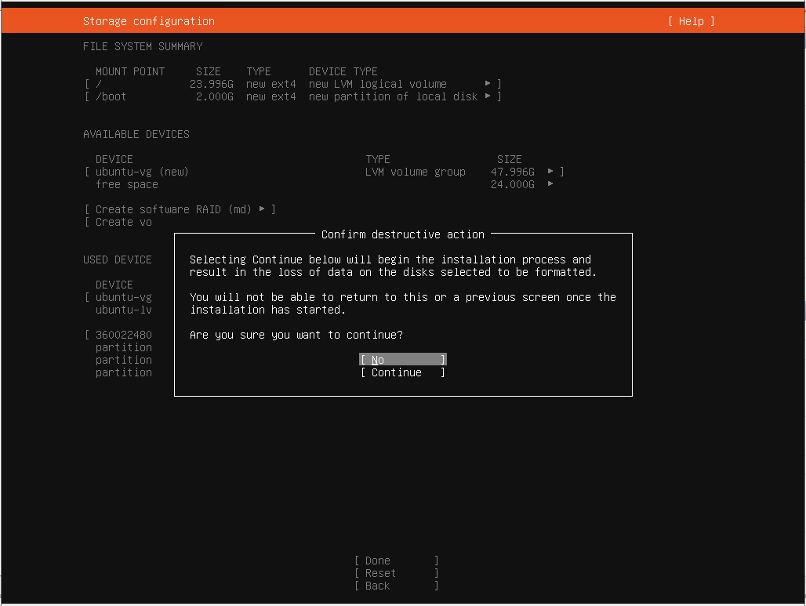
19. Continue

20. Confirm the destructive action
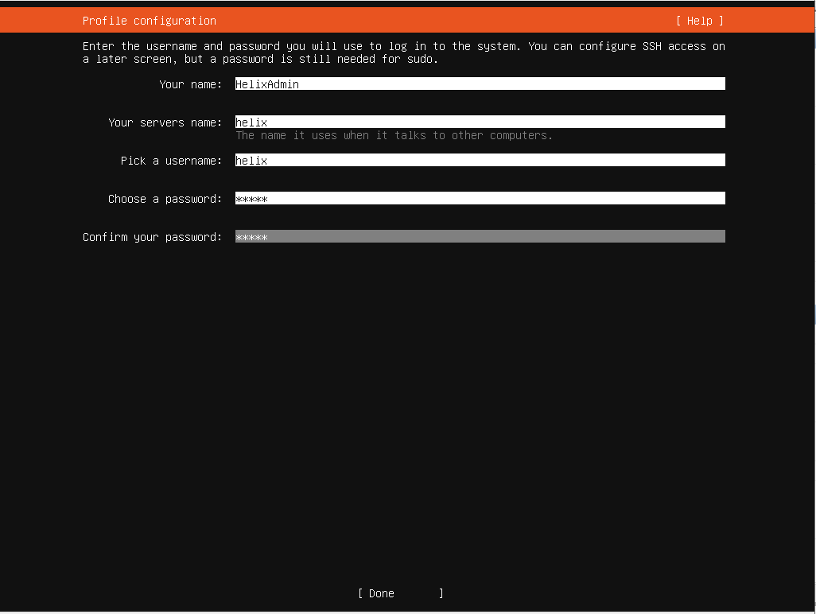
21. Configure the name of the server, admin username, and password
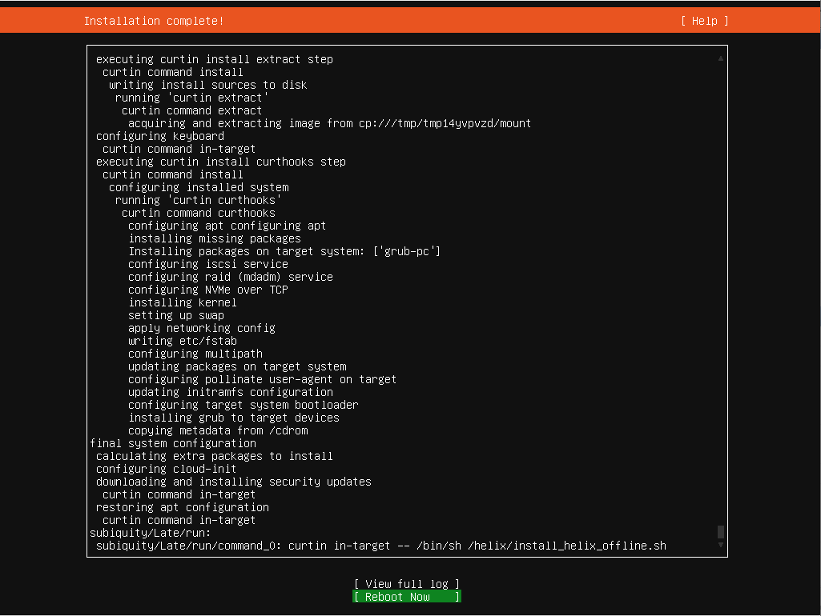
22. Wait for the installation to complete and reboot the system
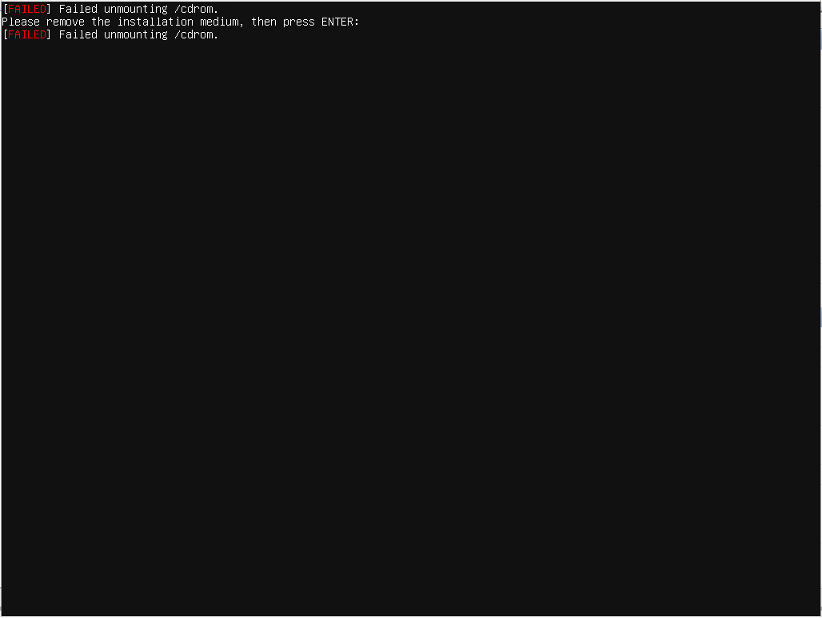
23. Press the Enter key when you are prompted to remove the installation medium
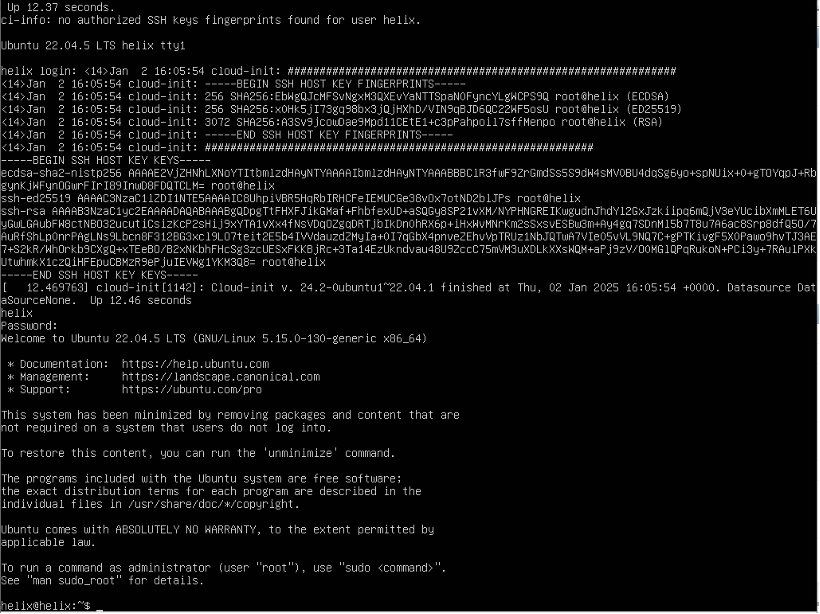
24. Login to the Helix Server
From here, you can refer to the Helix API Documentation to begin using the Helix Server to protect your resources/butt
- Download the Helix Authenticator.
- Open the application and accept the EULA

3. Click ‘Continue without an Account’

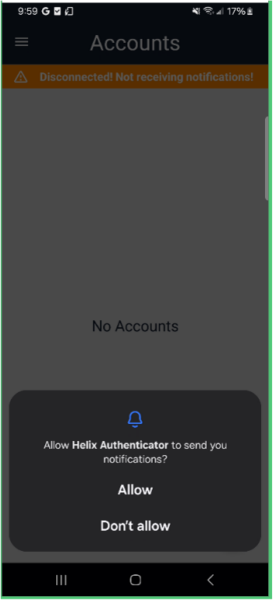
4. Allow Notifications
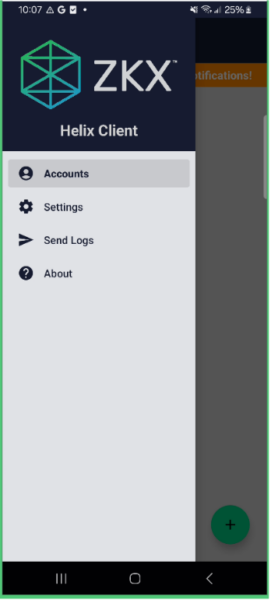
5. Press the hamburger menu in the top-left corner

6. Select “Settings”
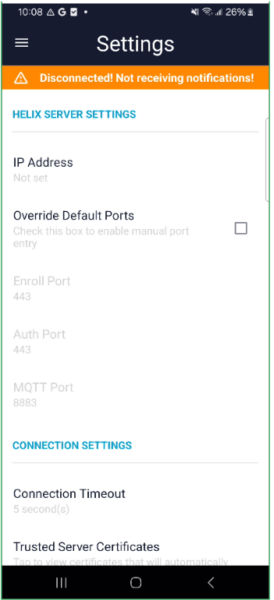
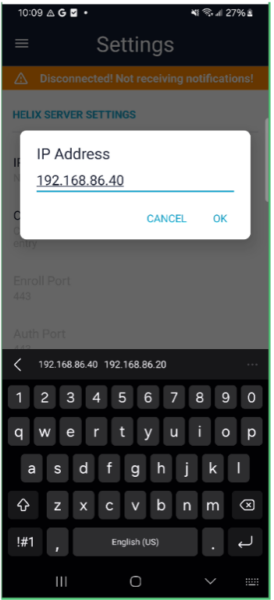
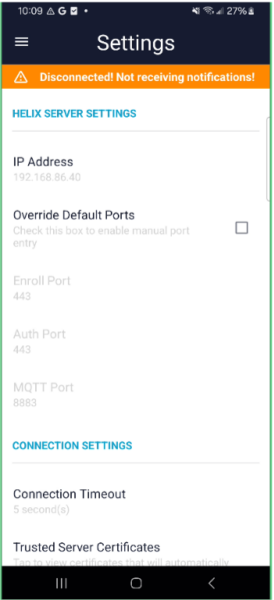
7. Enter your Helix Server’s Hostname or IP address
8. Return to the Authenticator Accounts page
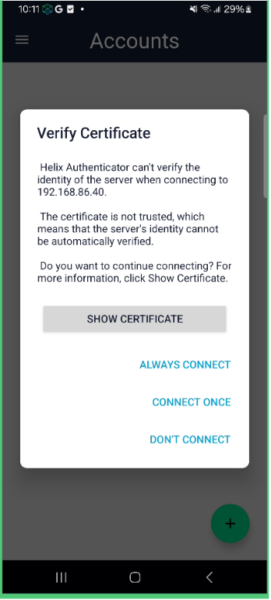
9. Always trust the certificate
10. You’re good to go!